FILL MATERIAL NEW
Give the Letters a Surface
Water droplets, glitter, iridescence, stained glass. Choosing a built-in material turns a flat fill into a surface, and the color or gradient underneath carries straight through.
- Thirteen materials
- Up to five controls each
- Builds on the fill color
How to Use
- Set Page to
Global Settings. - Open the Texture group under Color Settings.
- Choose a material in Texture.
- Shape the surface with P1-P5, whose names follow the material you chose. P5 shows only for the materials that use it.
- Adjust the color with Texture Color.
How the Materials Differ
| Material | Character |
|---|---|
| Water Droplet | The letters swell as though full of water, with highlights across the surface - a droplet running down a window, or wet jelly |
| Air Cushion | A film sealed at its edges and inflated inside, like bubble packaging |
| Glitter | Fine metal flakes packed densely, with those facing the light catching it. They appear over the stroke too |
| Iridescent | Rainbow colors from thin-film interference - the look of a soap bubble or a beetle's shell. Raising Film Variation makes the film uneven, so the colors flow like an oil slick |
| Faceted | The letter cut from flat faces that lean in from its outline, like a letter carved in stone. The faces meet along straight ridges and split crisply into light and shade |
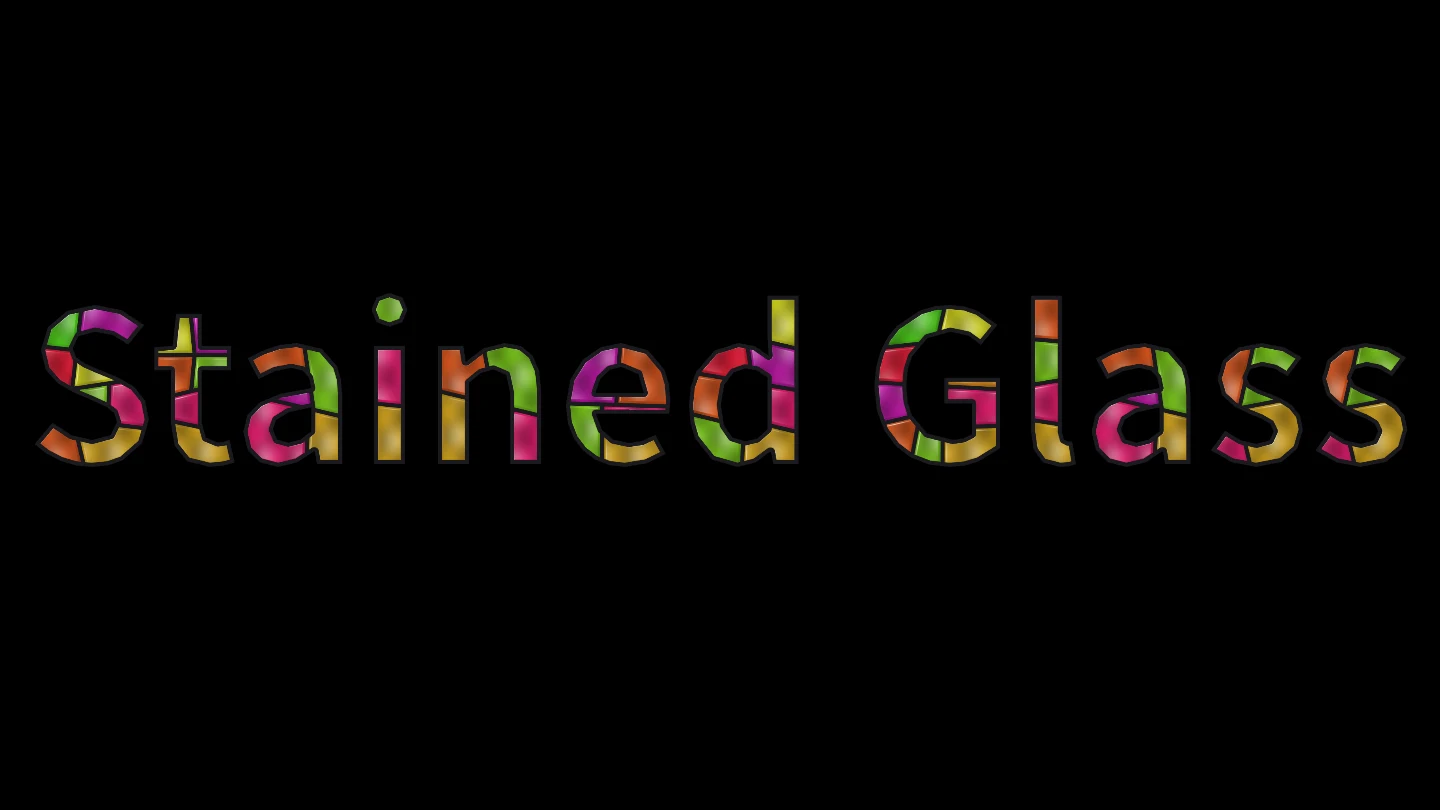
| Stained Glass | The fill split into pieces of colored glass, outlined with lead came |
| Metallic | Brushed metal with fine hairline scores. The fill color is the metal's own color: ochre reads as gold, light gray as silver, red-brown as copper. Hairline Angle turns the scores |
| Metallic 2 | Chrome plating that reflects a sky and a horizon, shining with a crisp switch from light to dark, with Exposure controlling the brightness itself |
| Stripe | Parallel stripes in a color you choose, laid over the fill. Count, width, angle and strength are adjustable |
| Colored Pencil | A solid fill with thin white scratches scattered at random, and the edges facing the light left bare, like pencil on white paper. The fill color is the pencil and Texture Color is the paper |
| Halftone | A grid of round dots in a color you choose, laid over the fill. Raising Fade shrinks the dots along a direction you set with Fade Angle (0 thickens them downwards) |
| Halftone Diamond | The same halftone with diamond-shaped dots, drawn with the area of a round dot so switching between the two does not change how dark it looks |
| Prism Foil | The fill replaced by silver prism foil: rays of light and rainbow fan out from the centre of each square tile, like a holographic sticker. Moving Light Angle shifts which tiles and rays catch the light |
Control Mapping
The five controls (P1-P5) are generic slots shared by every material, renamed to suit the one you choose (P5 is shown only for the materials that use it).
| Texture | P1 | P2 | P3 | P4 | P5 |
|---|---|---|---|---|---|
| Water Droplet | Thickness | Roundness | Gloss | Light Angle | - |
| Air Cushion | Inflation | Seal Width | Wrinkles | Light Angle | - |
| Glitter | Flake Size | Highlight Ratio | Flake Amount | Light Angle | - |
| Iridescent | Film Thickness | Hue Range | Strength | Light Angle | Film Variation |
| Faceted | Facets | Bevel Depth | Polish | Light Angle | - |
| Stained Glass | Piece Size | Lead Width | Hue Range | Glow | - |
| Metallic | Polish | Relief | Reflection Contrast | Light Angle | Hairline Angle |
| Metallic 2 | Polish | Relief | Exposure | Light Angle | - |
| Stripe | Stripe Density | Stripe Width | Strength | Stripe Angle | - |
| Colored Pencil | Scratch Density | Scratch Length | Light Amount | Stroke Angle | Light Angle |
| Halftone | Dot Density | Dot Size | Fade | Grid Angle | Fade Angle |
| Halftone Diamond | Dot Density | Dot Size | Fade | Grid Angle | Fade Angle |
| Prism Foil | Tile Size | Hue Range | Strength | Light Angle | Grid Angle |
The angles (0-360) are Light Angle, Stripe Angle, Grid Angle, Fade Angle and Stroke Angle; every other control runs 0-1. Stained Glass puts Glow in that same fourth slot, and it is not an angle: 0.5 is plain glass, raising it makes the panes emit, and lowering it makes them go dark.
Building on the Fill Color
A material does not replace the fill; it is layered on top of it (Prism Foil is the exception; see below). Font Color, the gradient, and individual character colors all stay visible underneath, so your choice of color carries straight through to the result.
How the color is decided differs by material, though. Stained Glass takes the hue of what is underneath as the starting point for each piece of glass, so the fill color sets the palette of the result. Glitter, by contrast, takes its metal color from Texture Color rather than from the fill.
Stripe, Halftone and Halftone Diamond draw their stripes and dots in Texture Color. Colored Pencil is the other way round: the fill color underneath is the pencil, and Texture Color is the color of the white scratches left unpainted (the paper).
Prism Foil replaces the fill with the foil, so the color underneath only shows through when Strength is lowered. Texture Color sets the color of the foil: the default white is silver, and a yellowish color makes gold foil.
TIP
Combined with a gradient, Stained Glass changes the color of its pieces across the text - an effect that is hard to build from a single fill color.
Recipes
Glitter in gold
- Set Texture to
Glitter. - Set Texture Color to gold; this is the base color of the metal flakes.
- Set the flake density with Flake Amount (P3).
- Raise Highlight Ratio (P2) to light up more of the flakes.
- Keyframe Light Angle (P4) and the lit flakes change over, so the sparkle moves.
From single-color glass to many
- Set Texture to
Stained Glass. - Hue Range (P3) at
0keeps every piece on the fill's own hue. - Keyframe Hue Range from
0to1and the colors spread out over time.
Driving It from a Script
ctx.global.texture sets the global material and its controls, and setting use = true on ctx.chars[i].texture or ctx.parts[i].texture gives a single character or part a material of its own (per-character and per-part material overrides are available from Lua scripts). See Animating with Lua Scripts for more.
When the Result Is Not What You Expected
- No material appears at all - Check whether Transparent Fill is on. It removes the fill itself, and the material layered over it goes with it (only characters and parts using an individual color keep theirs).
- Texture Color changes nothing - You are probably on Iridescent, which ignores it: its colors come from the thin film itself.
- Colored Pencil shows no scratches - Check that Scratch Density (P1) is not
0; at0no white scratches appear. The bare edges facing the light are set by Light Amount (P3), so0removes those too. - Prism Foil hides the fill color - The foil replaces the fill. Lower Strength (P3) to let the color underneath show through.
- MT Sim looks different from the plugin - Textures in the MT Sim preview (VSCode extension) are a simplified hint. For Colored Pencil it leaves out the bare edges facing the light. For Prism Foil it paints the rays of each tile as a few wedges, so their edges look angular. Iridescent's Film Variation is not shown. The choice of material and the effect of each control can be checked there, but confirm the final appearance in the plugin itself.