Getting Started
Mug Typography comes with nine presets: six for 2D, two for 3D, and a Scripting preset built for Lua-driven animation. Start by choosing between flat (2D) or perspective (3D) typography, then pick Standard or Lite and a size tier based on whether you need part-level controls and how much text you have. If you plan to drive characters and parts primarily from a Lua script, choose the Scripting preset.
In the Trial version, the maximum character count is capped at 8 regardless of which preset you choose.
STEP 1: Choose 2D or 3D
Mug Typography 2D
For everyday titles, subtitles, and motion graphics
Edit characters and parts on a 2D plane using position, rotation, scale, and stretch. Available in Low, Mid, and High capacity tiers.
Mug Typography 3D
For camera angles, perspective, and depth
Adds Camera Settings, Z-depth positioning, and 3D rotation. Character and part limits match the Mid tier. See "Create 3D Typography" for details.
STEP 2: Choose Standard or Lite
Mug Typography Standard
When you want to animate individual parts
Includes Part Settings so you can adjust position, color, and motion for each part inside a character.
Mug Typography Lite
When character-level editing is enough
Omits Part Settings for faster loading and lighter Inspector responsiveness. Supports 1.5× as many characters as Standard and up to 1,024 parts.
STEP 3: For 2D, choose a size (Low / Mid / High)
3D presets use the Mid tier limits. For 2D presets, pick a size based on how long your text is and how complex the glyphs are.
Size Low
For short text
Provides the best performance
Size Mid
For typical text
Choose this first if you are unsure
Size High
For long text and complex kanji
⚠️ Uses more memory
When Lua scripts are your primary workflow
Mug Typography Scripting
For controlling characters and parts from Lua
A scripting-focused preset that omits Character Settings and Part Settings and supports up to 512 characters and 1,024 parts. It also supports the 3D camera, while per-character and per-part values are controlled from Lua. For details, see "Animate with Lua Scripts."
Together, the six 2D types, two 3D types, and one Scripting type provide a total of nine available presets.
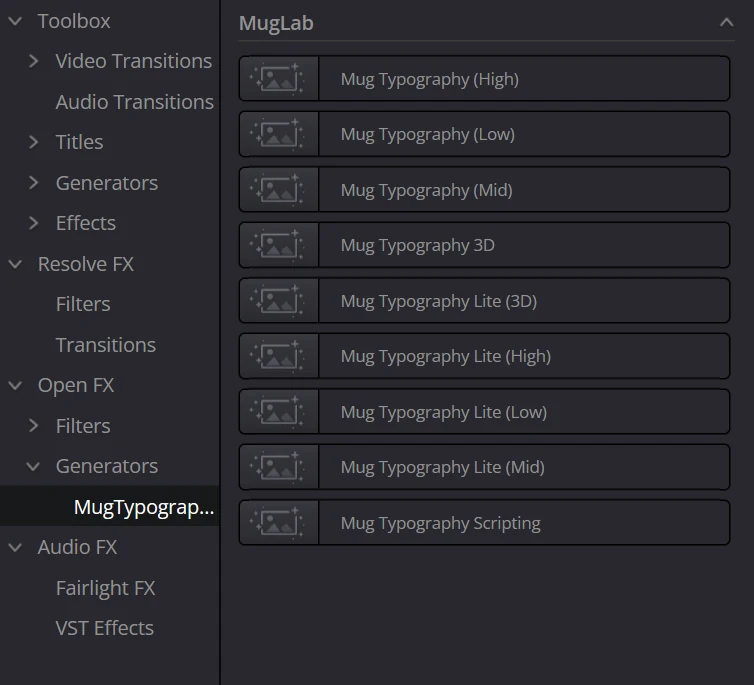
All nine presets displayed in the DaVinci Resolve Effects Library
TIP
The more parameters a preset has, the slower the response becomes when switching clips or nodes. Choose the preset that fits the number of characters and parts you actually need. Standard, Lite, and 3D preset limits can also be changed via maxCharacters / maxParts in preferences.json (3D presets use the mid setting, while Scripting is fixed at 512 characters and 1,024 parts; see "Customizing Preferences (preferences.json)" in the appendix).
NOTE
Any characters beyond the active limit are not rendered:
- Maximum character count exceeded: Characters after the limit (counted from the start of the text) are skipped.
- Maximum part count reached: Starting with the character that would exceed the part limit, that character and any following characters are skipped as whole characters (a character is never drawn half-complete).
You can check the active limits at any time in the Version field at the top of the Inspector, shown as (C:characters, P:parts) (e.g., 6.6a (C:30, P:84)). If part of your text is missing, check this field first.
Edit Page
Under Open FX in the Effects Library, the nine presets above are available in the following two locations to suit different uses. Place or apply them on the timeline as needed.
Generator
- Effect Library
- Open FX
- Generators
- MugLab
- Mug Typography (Low / Mid / High / Lite / 3D / Scripting…) All 9 types
Place as a new clip
Use this when you want to place the plugin directly on the timeline as a new clip. You can drag and drop it onto the timeline.
Filter
- Effect Library
- Open FX
- Filters
- MugLab
- Mug Typography (Low / Mid / High / Lite / 3D / Scripting…) All 9 types
Apply as an effect to an existing clip
Use this when you want to apply the plugin as an effect to an existing clip. On other pages, such as the Color Page, only this version (Filters) is displayed.
Enable controls in the Viewer
To use on-screen handles in the Viewer (for moving, rotating, scaling, and so on), click the overlay selector icon at the bottom left of the Viewer (highlighted in red below) and select Open FX Overlay.
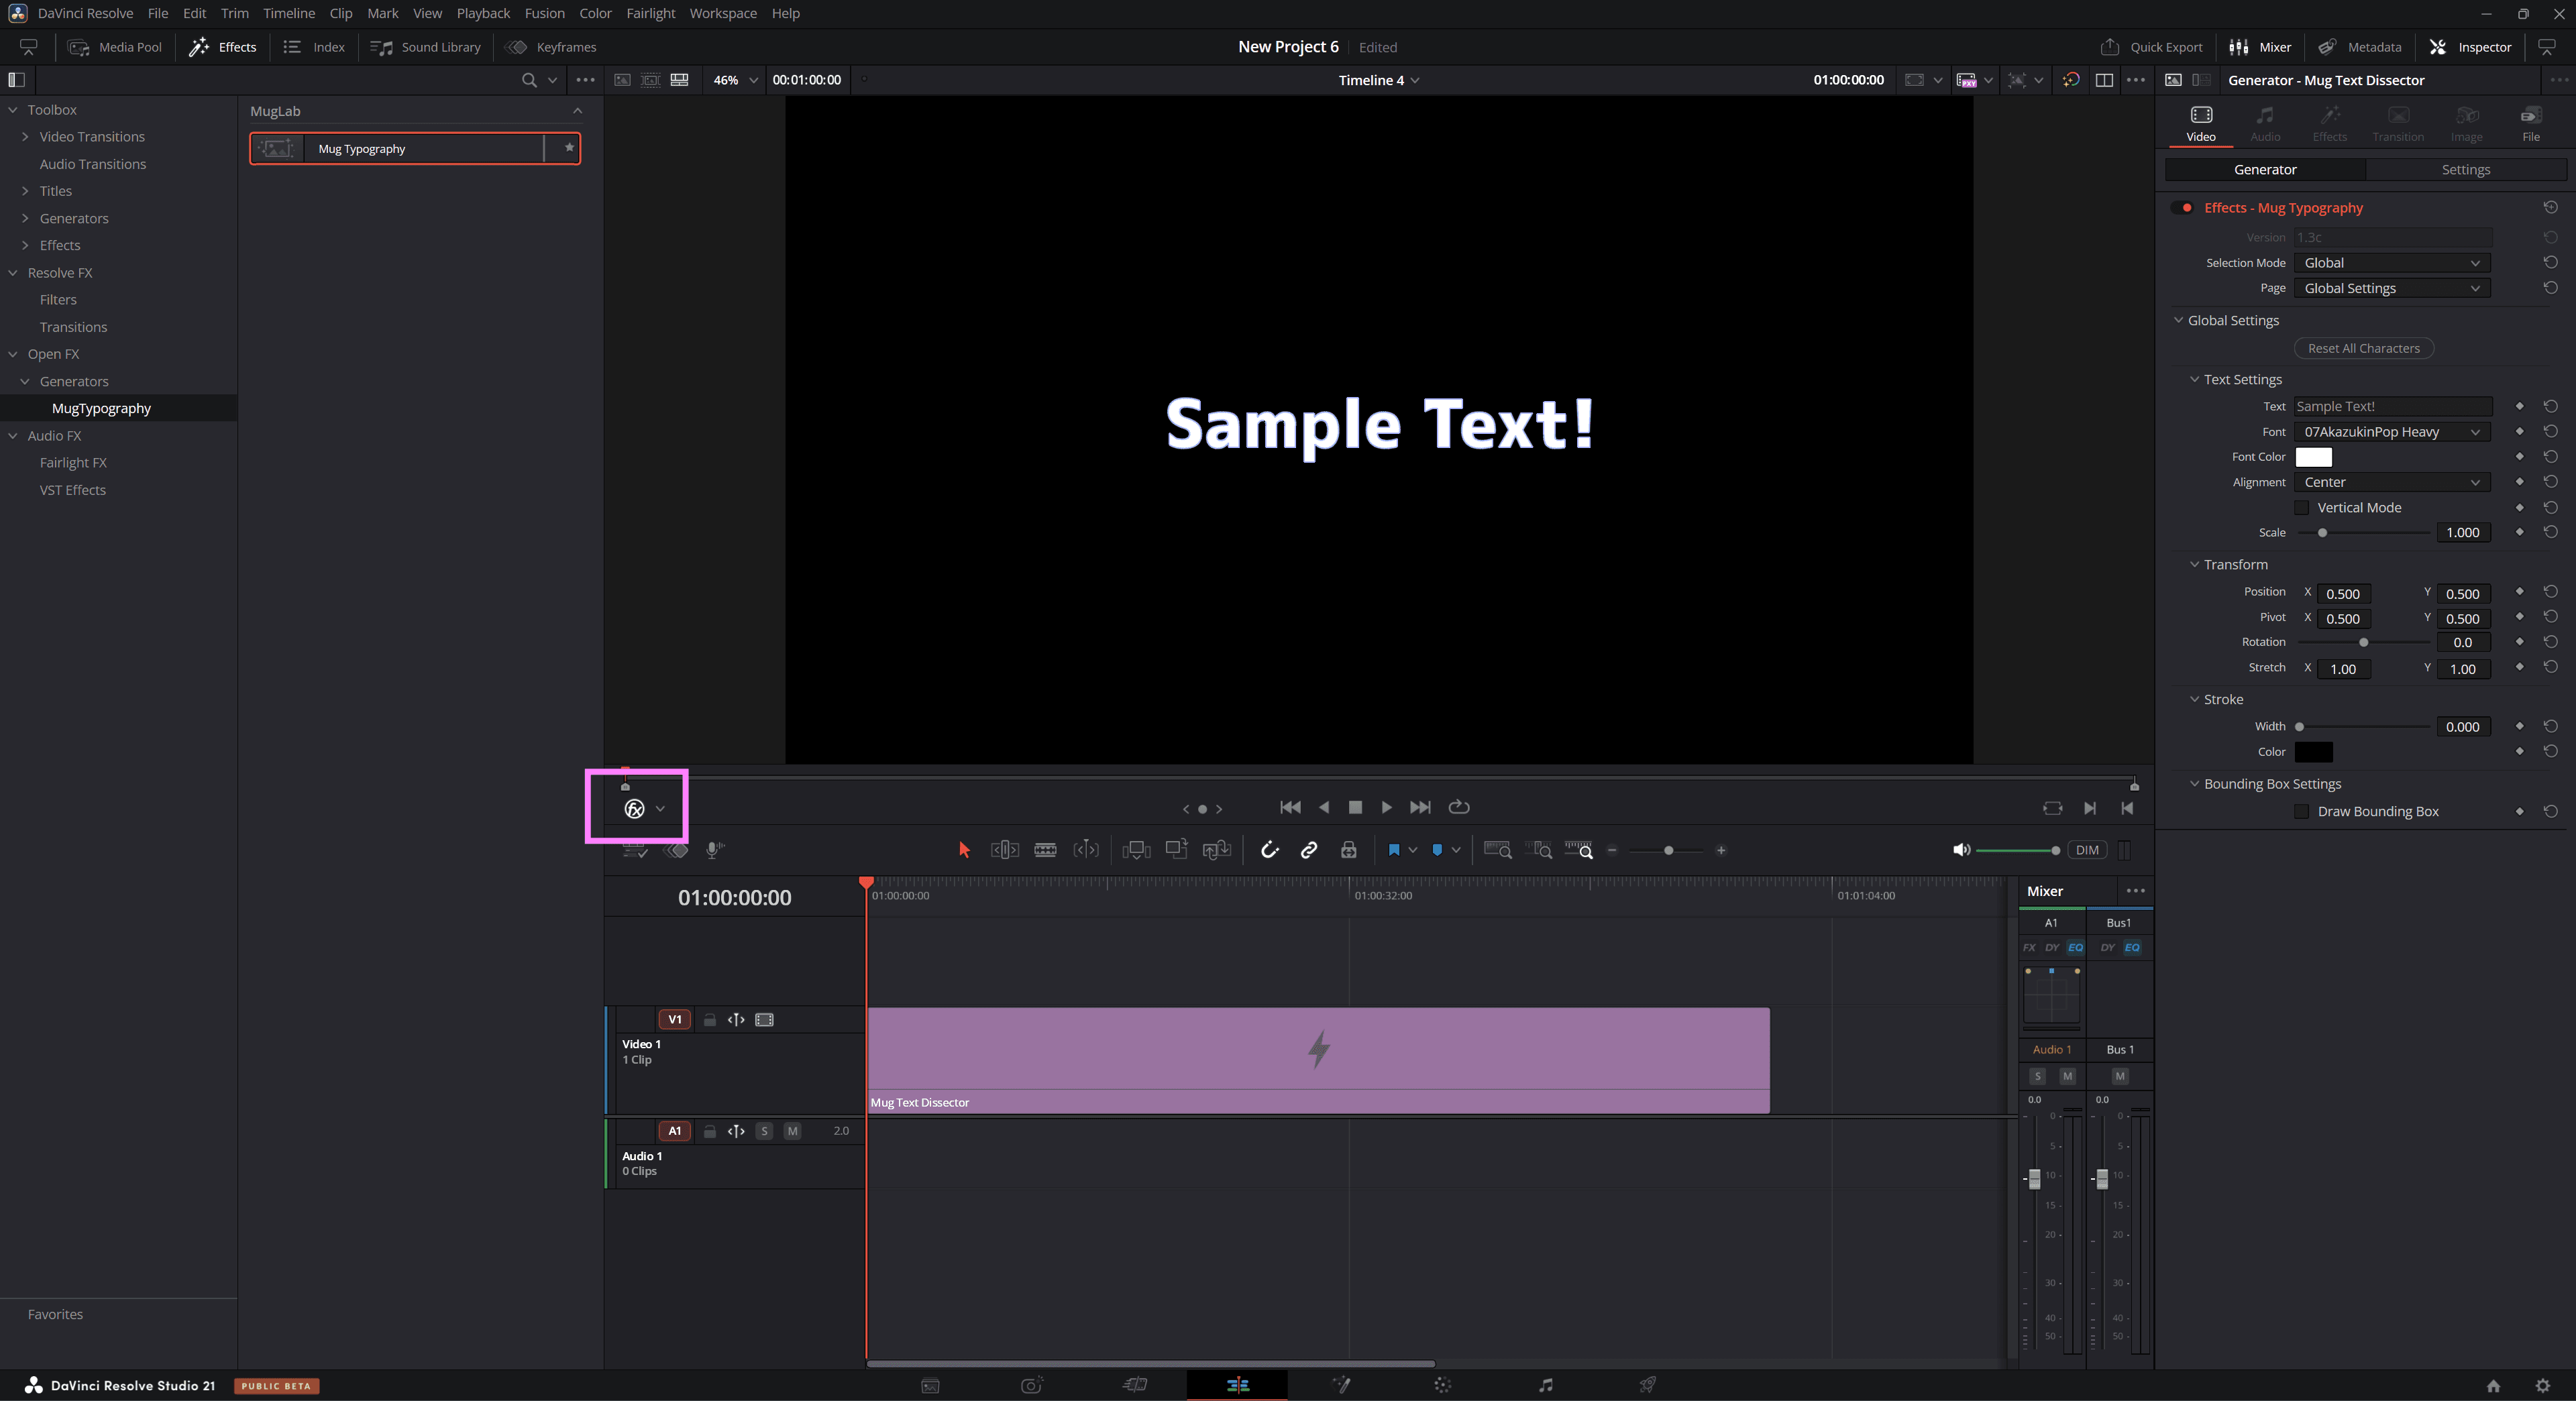
Example of use on the Edit Page (select Open FX Overlay using the switch at the bottom left of the Viewer)
NOTE
The Edit Page has limitations imposed by DaVinci Resolve. For details, see "Limitations" in the appendix.
Fusion Page
On the Fusion Page, add the node for the required preset to the node graph from the following location. All nine presets available on the Edit Page can also be added as nodes.
- Tools
- OpenFX
- MugLab
- Mug Typography (Low / Mid / High / Lite / 3D / Scripting…) All 9 types
The node's Input port does not need to be connected - the node works on its own. When an input is connected, the input image is rendered as the background, with the text composited on top.
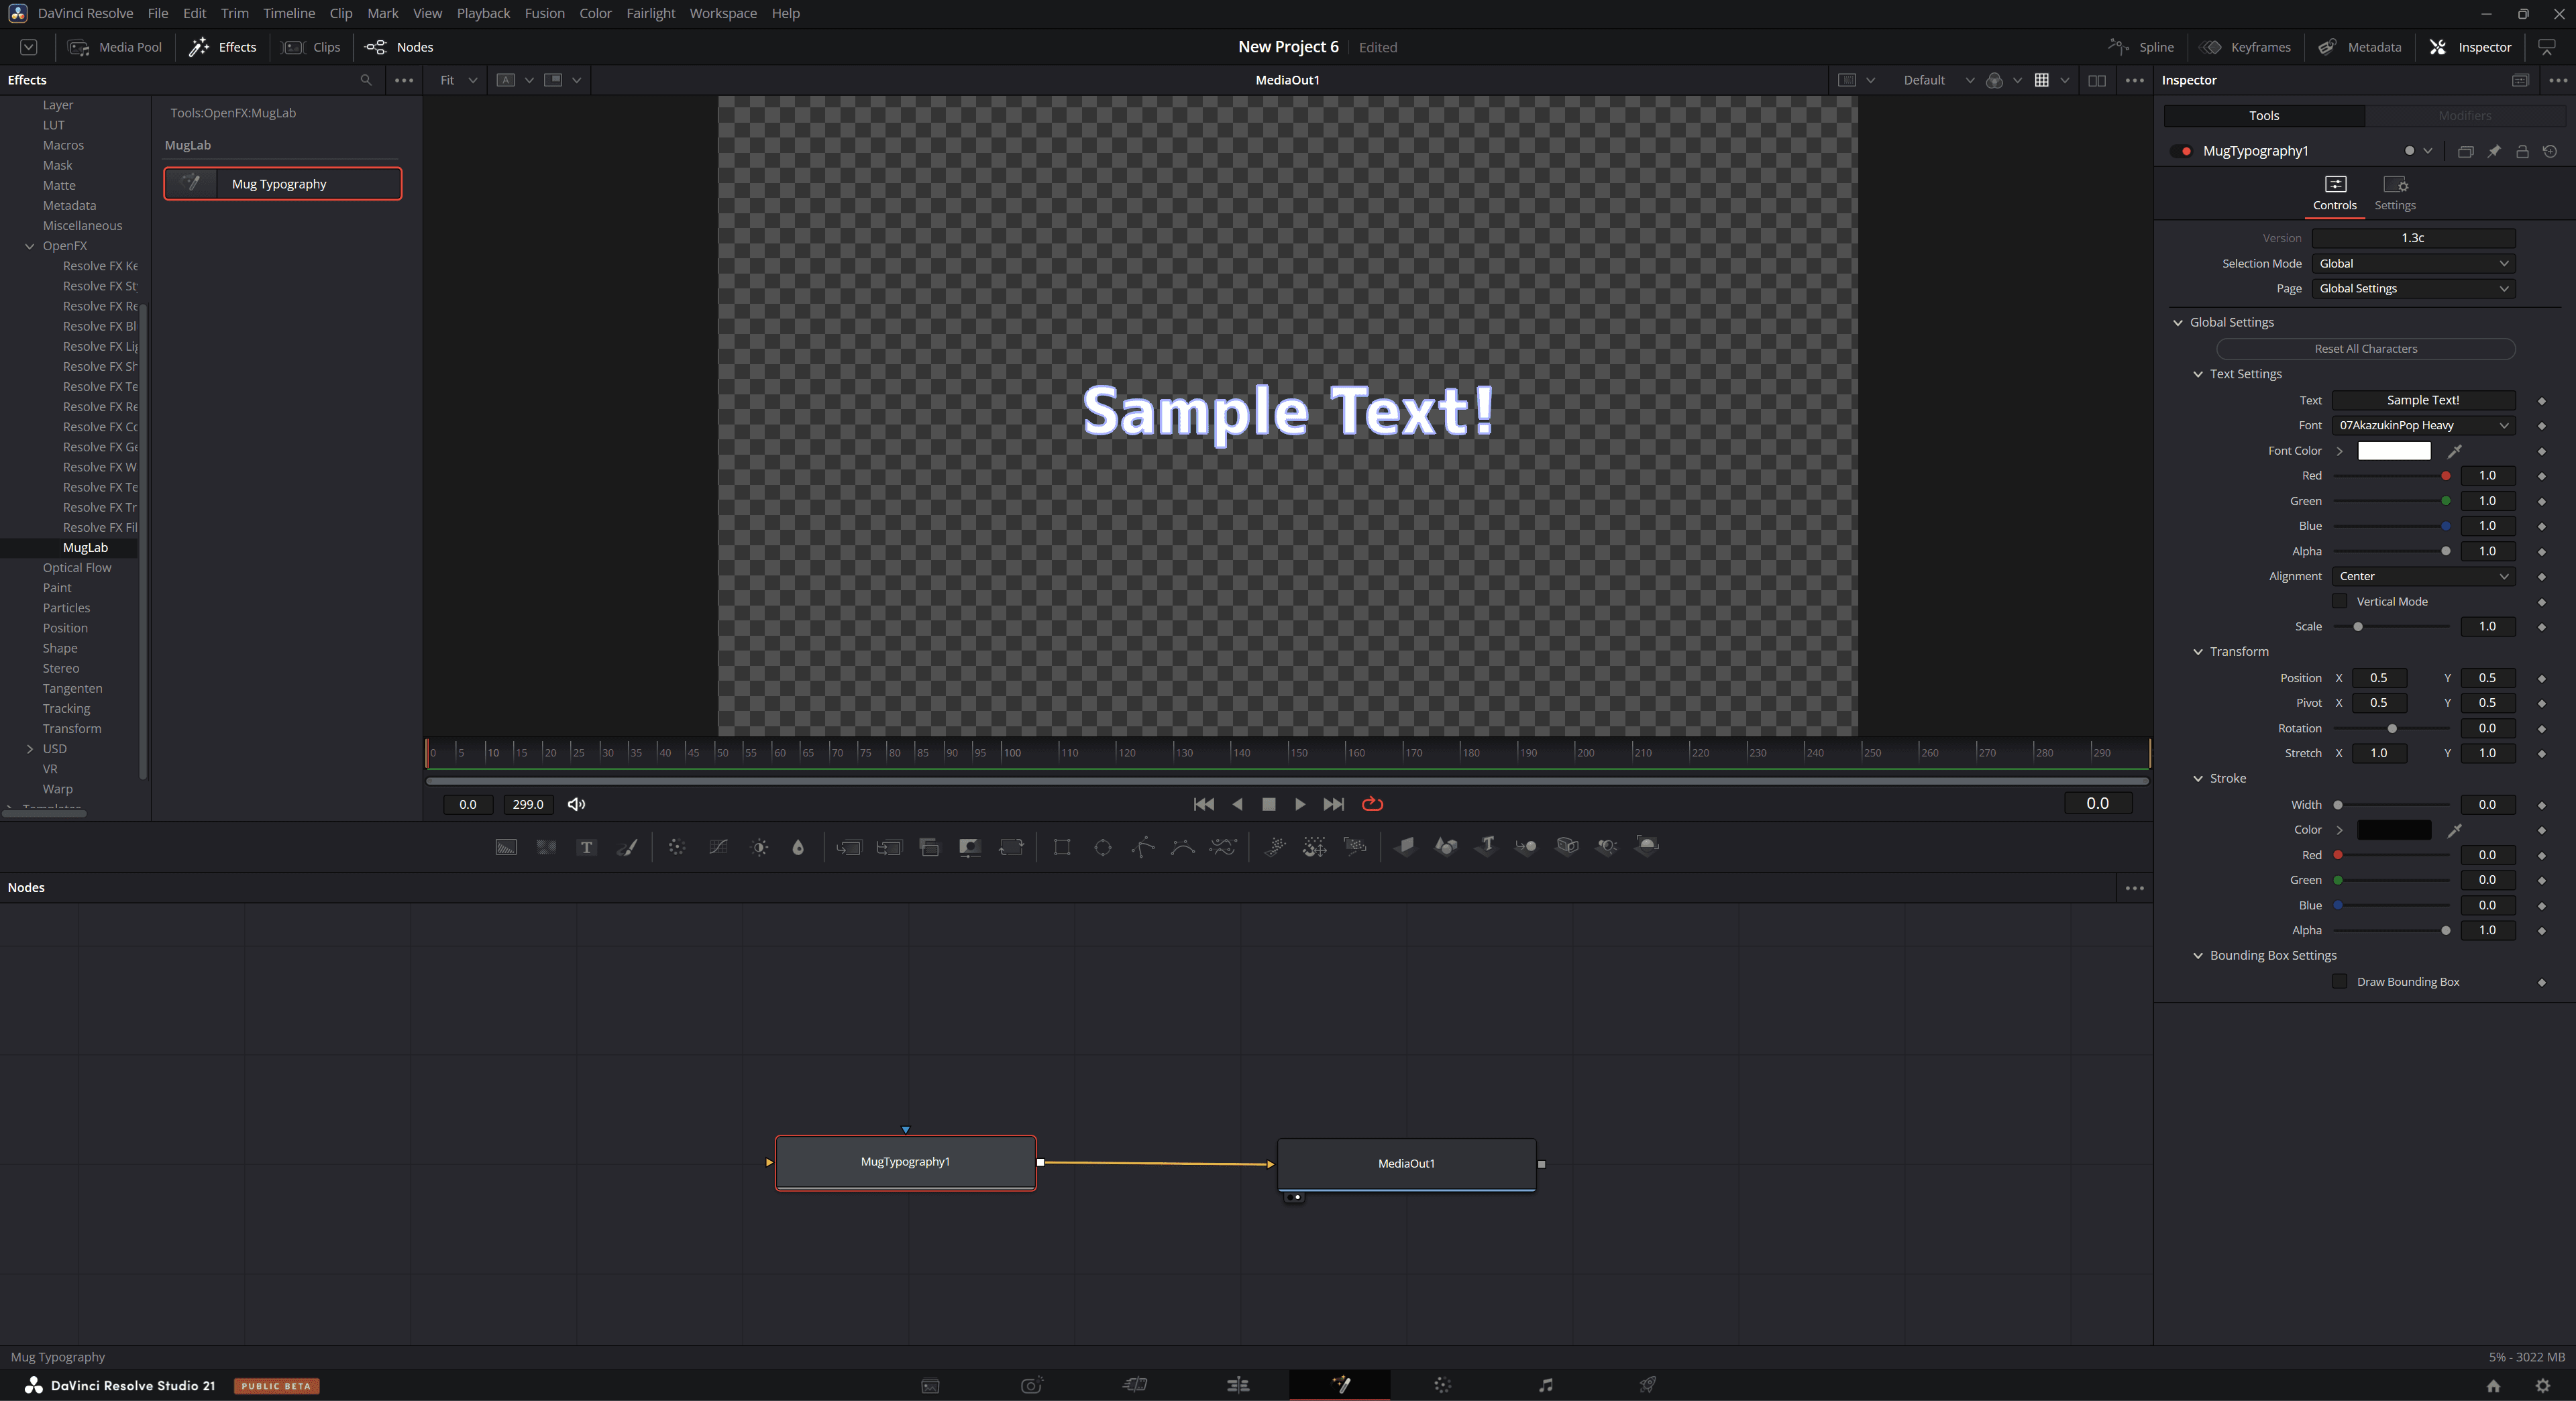
Example of use on the Fusion Page (with a Mug Typography node added)